Flooring Repair 101: Fixing Scratches, Dents, and Gaps
Floors carry the whole story of a home. They take the scuffs from kids’ scooters, the dents from an overambitious furniture rearrangement, the gaps that show up after a dry winter. Some of that patina looks good. The rest is just damage, and if you ignore it long enough, small issues turn into loose boards, cupping, or even trip hazards. The good news is that most surface wear and minor defects on wood, laminate, vinyl plank, and even tile can be repaired with basic tools and a practical approach. When the problem runs deeper, a professional hand makes all the difference, especially if you want the repair to disappear under daylight and resale scrutiny.
I’ve been called to jobs where a homeowner tried a marker set on white oak and ended up with zebra stripes, and to others where a simple paste wax fix would have saved a costly plank replacement. What follows is a practical guide, grounded in field experience, that helps you identify what you’re looking at and how to fix it right the first time. If you’re in a climate like Charlotte’s, where humidity swings are real and subfloors can vary from crawl spaces to slabs, a little local know‑how goes a long way. A reputable flooring company, whether a general flooring installation service or a focused flooring repair specialist, can help you choose the right route. I’ll call out those decision points clearly.
Understanding what you’re dealing with
Repair starts with diagnosis. Scratches, dents, and gaps may look similar from five feet away, but they behave differently and respond to different fixes.
Surface scratches catch light; you’ll see them more than you feel them. They often live in the finish layer, not the wood itself. Deeper scratches cut through finish into the wood or wear layer. Dents are compressions, usually from an impact, where fibers pushed down but rarely broke. Gaps are separations between boards or tiles. On wood and many vinyl plank floors, seasonal flooring installation service charlotte Charlotte, NC movement can open and close gaps. Persistent gaps point to installation or environmental issues.
Two more things matter before any repair: the material and its finish. Solid hardwood can be sanded and refinished multiple times. Engineered wood has a finite wear layer, sometimes 2 to 6 millimeters, which limits sanding. Laminate has a printed face under a hard wear coat and cannot be sanded, so repairs are touch‑ups or plank swaps. Luxury vinyl plank and tile (LVP/LVT) can be heat repaired, filled, or replaced plank by plank. Tile needs matched grout and sometimes a new piece.
Finish drives color matching and adhesion. Oil‑based polyurethane ambers with age; waterborne poly stays clearer. Aluminum oxide factory finishes resist abrasion, which is great until you try to blend a repair. Oil‑wax blends like hardwax oil repair more easily on the spot but require consistent maintenance. If you don’t know your finish, test in an out‑of‑the‑way corner with mineral spirits and denatured alcohol. Waterborne poly softens slightly with alcohol; oil poly doesn’t. Mineral spirits will wet and deepen oil‑finished wood temporarily, a hint for color matching.
Scratches: from superficial to stubborn
Most scratches arrive courtesy of chair legs, pet claws, grit under shoes, or sliding something heavy across a fine finish. If the scratch is white or gray and disappears when you wipe with water, it’s likely only in the topcoat. If it stays dark when wet, it has cut into the wood fibers.
For light abrasion on a polyurethane finish, a gentle buff and topcoat blend often does the trick. Micro‑mesh pads, 1500 to 3000 grit, abrade without leaving obvious swirls. Feather the edges and avoid creating a shiny halo by staying small and controlled. I’ve blended thousands of square inches of finish with a pad under hand pressure and a light touch. Clean thoroughly, then use a compatible touch‑up finish, like a waterborne polyurethane for a waterborne system. Spot finishing on factory aluminum oxide floors is tougher, and your blend line will often show under certain light. Foot traffic and a matte sheen help hide that line.
If the scratch reaches wood on a site‑finished floor, color comes first. Use pigments or stains that match the surrounding area at its current age, not the original brand’s “natural oak.” Age and UV shift wood color. I usually make a test strip from scrap or a closet plank with one or two stain formulas, then use a tiny artist’s brush to color only the exposed wood. Let it dry. Seal with a compatible finish, starting with a thin coat, then a second, scuffing lightly between if the product requires it. Keep the repair smaller than a quarter to reduce the halo effect. On deep gouges, a wood filler or a burn‑in stick is next.
Burn‑in sticks, popular with cabinet finishers, are resin rods that melt into a void with a heated knife. They create a durable fill that accepts topcoat and takes color well if you blend multiple tones. The trick is heat control and leveling. Work cooler than you think. Overheating scorches the surrounding finish and cooks the oils in the wood, causing a permanent dark ring. Practice on scrap first.
Laminate and LVP scratches are a different animal. You cannot sand a laminate face without exposing the paper. Instead, clean carefully, use a manufacturer‑approved repair kit or a high‑quality putty to fill any groove, then top with a color‑matched marker to recreate grain. Contrast and sheen sell the illusion. Too dark and the repair draws the eye. On LVP, light heat from a hair dryer can sometimes relax scuffs. Avoid open flame and high temperatures, which can distort the plank.
Pets leave a signature trail at doorways. For those, I recommend two moves: soft urethane casters or felt pads on doors that tend to get nudged, and a nail maintenance schedule. A simple trimming routine reduces future damage more than any product.
Dents: compressed fibers and how to lift them
Wood dents when the fibers get crushed. If the surface film remains intact, you can sometimes coax those fibers back. On unfinished or oil‑wax finished solid hardwood, a damp cloth and a household iron can raise a dent. The water wicks in, turns to steam with heat, and the fibers swell toward their original position. This only works if the fibers weren’t severed. I’ll normally apply a few drops of water, lay a thin cotton cloth over the spot, and tap the iron for short bursts, checking progress. Heat too long and you risk white rings in some finishes or new checks in dry wood. After raising, let it dry, then spot sand with 220 grit and re‑oil or apply finish as needed.
On polyurethane‑coated floors, the film prevents water from entering, so the steam trick rarely works unless the finish is abraded or broken. In those cases, I evaluate whether a small fill is cleaner than rescuing fibers. A high‑quality water‑based wood filler or a two‑part epoxy is more predictable than solvent putty, especially on high‑traffic areas. Two‑part epoxies like those used for boat repair have superior compressive strength. The catch is forgiveness. Epoxy sets hard, and mistakes are hard to reverse. Mix small batches, overfill slightly, level with a sharp chisel as it gels, then sand and color match.
Engineered wood dents call for restraint. If the wear layer is thin, aggressive sanding breaks through the veneer. I’ve seen 2 mm white oak veneers ruined by someone chasing a dent with an orbital sander. Spot filling and blending is safer than flattening the entire area. You can add micro‑bevels to disguise slight inconsistencies at board edges.
Dents in laminate and LVP respond poorly to heat or moisture. For laminate, the fix is often cosmetic coloring or replacing the affected plank. Luckily, click systems allow selective replacement if you can access a starting edge. Some installers cut the click tab and glue the replacement in place if they can’t reach an edge, but that’s a one‑way repair and requires precise carpentry to keep the surface flat. For LVP dents or divots, heat can soften some products enough to massage a minor impression, but deep craters need a fill designed for vinyl or a plank swap.
Tile dents don’t exist. If a ceramic tile looks dented, you’re seeing a glaze defect or a chip. Chips are filled with an epoxy repair and pigment, but any repair on glossy tile tends to show. Matching the sheen is the hardest part. In a visible area, replacing the tile is cleaner if you have attic stock. Keep 5 to 10 percent of your tile order for future repairs; future you will be grateful.
Gaps: movement, moisture, and method
Gaps can be a normal seasonal change in wood flooring, most obvious in homes with forced‑air heating through winter and open windows in spring. Wood acclimates to the average humidity over weeks, not days. A quarter‑inch gap that closes in summer needs environmental management, not filler. A persistent funnel‑shaped gap, wider at one end, points to installation tension or a board out of square. If the gap also shows a drop in one board, the subfloor could be at fault.
First question: does the gap change through the year? If yes, a humidifier and better floor protection might be smarter than caulk. Keep relative humidity in the 35 to 50 percent range for most hardwood installations. In Charlotte, summers bring high humidity and winters can be dry indoors, which makes those seasonal gaps predictable. A solid flooring contractor in Charlotte will check moisture in both subfloor and flooring before recommending any fix.
If the gap does not change and catches socks, you have a few options. For a narrow, stable gap in a rustic or oil‑finished floor, a color‑matched flexible filler or a wax fill works well. Oil‑based paste wax mixed with fine sanding dust from the same species blends the color and stays slightly plastic, which tolerates small movements. For cleaner floors and waterborne systems, a professional wood floor acrylic filler or a siliconized acrylic caulk that matches your floor can be used sparingly. Caulk has a bad reputation because it shines and draws the eye when misapplied. Tool it clean, keep it slightly below the surface, and avoid bright lighting during application so you don’t chase perfection into a smear.
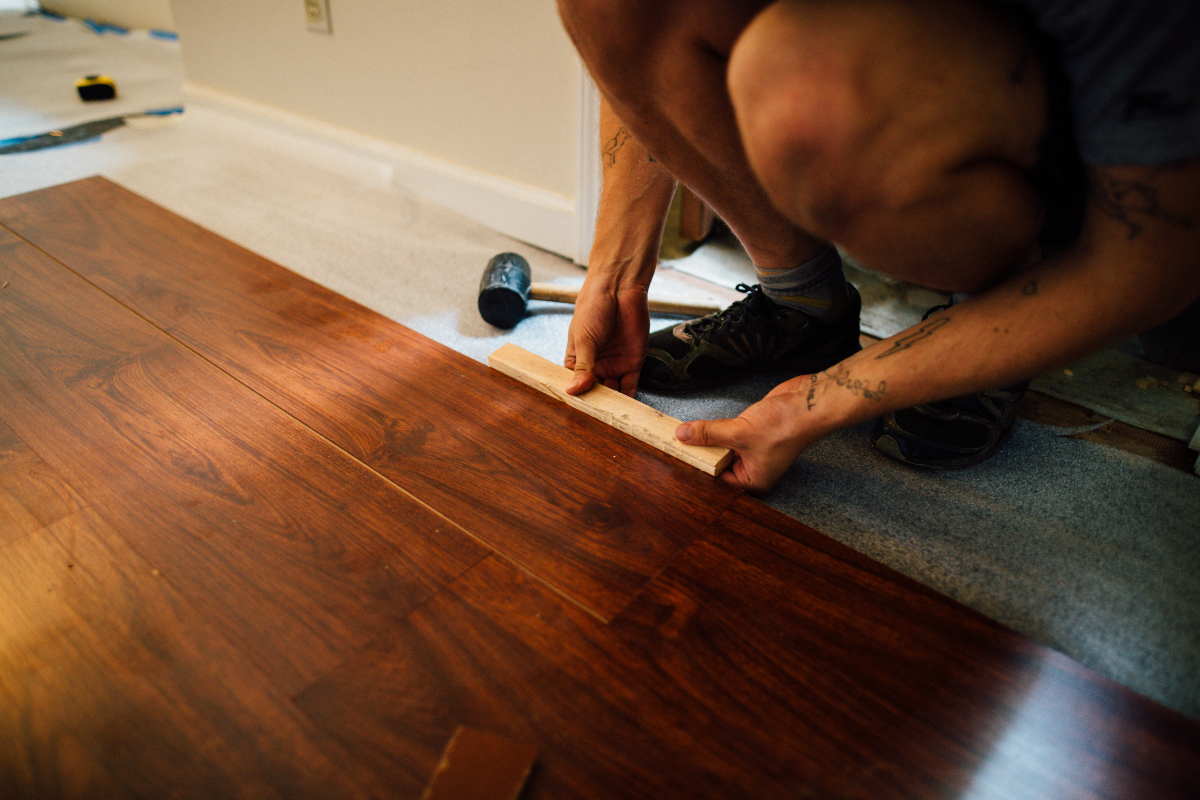
Larger fixed gaps may need a sliver. I’ve cut wedge slivers from matching boards, slightly tapers that fit snug midway and then seat tight with a few gentle taps and glue. The glue line should sit on the tongue or the side of the groove to avoid blocking seasonal movement where it still exists. Once the sliver is in, trim flush with a sharp chisel across the grain. Blend the finish. This approach holds up well, but it depends on a stable substrate. If the subfloor is moving, slivers pop out.
Gaps in engineered wood often stem from a failed click joint or adhesive release. You can sometimes pull a stubborn gap closed with specialized flooring straps, but in a fully glued floor, forcing movement risks more failure. If straps don’t bring it back, the right fix is plank replacement and re‑adhesion.
Laminate gaps are usually joint failures or insufficient expansion gaps at the room perimeter that forced boards inward. Before you touch the interior gap, check the perimeter under baseboards and door casings. If the floor is pinched, relieve it by cutting back at the edges. Then try tapping blocks and straps to re‑engage the joint. If the click edge is crushed, the joint won’t hold. Replace the plank.
With LVP, heat and pressure can persuade a slight gap to close, especially in floating installations. A low‑temperature heat gun, gentle pressure, and weight while it cools sometimes saves the day. If the click has chipped, replacement is the durable fix. For glue‑down LVP, inject adhesive with a syringe under the gap and weight it. Use the adhesive recommended by the manufacturer so plasticizers in the vinyl don’t soften the bond later.
Tile gaps mean grout failure. Rake out the loose grout to at least two‑thirds of the joint depth, vacuum, and regrout. If cracking recurs, movement is still happening. Evaluate the substrate, especially on wood subfloors without adequate underlayment or where structural deflection exceeds tile standards.
Tools, materials, and matchmaking
You can do a great deal with a small kit. The temptation with repairs is to throw every product at the problem, which often creates bigger blending issues than the original defect. I carry a handful of essentials and build up only when the situation demands.
- A compact repair kit that earns its keep: microfiber cloths, denatured alcohol and mineral spirits, painter’s tape, micro‑mesh pads, small artist brushes, a utility knife, a sharp 1‑inch chisel, wood and vinyl putties in a few base tones, a two‑part epoxy, burn‑in sticks and a low‑temp tool, a heat gun with fine control, color markers and wax crayons, a small bottle of waterborne polyurethane, a wipe‑on oil or hardwax oil, a few syringes for adhesive injection, strap clamps, and felt pads.
Color matching deserves its own paragraph. Don’t aim for one color. Wood is variegated, so you build a match with two or three tones: a base to match the field, a darker tone to mimic grain, and sometimes a warm or cool glaze to push the hue. I’ll test on a white card, then on inconspicuous floor space. Light the area the same way it will be seen: if a kitchen has cool LEDs, match it under cool LEDs. If you get it right under one light and wrong under another, it’s common. Wood shifts under different color temperatures. Choose the light the room lives in most.
Sheen is the last mile. If you spot coat a satin poly over a matte floor, the repair screams. Visually, sheen mismatch stands out more than subtle color mismatch. Either use the exact product used originally or adjust with a dulling agent. Some waterborne finishes allow adding flattener. Go slow. Too much flattener clouds the finish.
When to replace a plank instead of patching
People love the idea of a surgical touch‑up, but not every defect should be disguised. If a plank has a long, deep gouge that spans grain, or the wear layer is punctured across a large area in engineered wood, replacement yields a cleaner result in less time.
On floating click floors, remove baseboards, back out rows to the damaged plank, swap it, and reinstall. If you can’t access an edge, you can cut out the center of the plank, free the tongue sides with careful plunge cuts, and glue a new one with the bottom of the groove trimmed off. This “drop‑in” method sits on glue and relies on your ability to keep it flush and tight. Weight the repair overnight.
On glue‑down engineered or LVP, score around the perimeter, plunge cut diagonally, remove the center, then clean the adhesive. Prep the subfloor clean and flat, butter the replacement plank with adhesive, and set it in. Use blue tape to hold edges tight, and roll it lightly.
Site‑finished hardwood plank replacement requires more steps and a few tradeoffs. You cut out the plank, undercut the tongue of the neighbor so you don’t wreck its profile, install a new board, then sand and finish at least that board. The blend line may still show. If your floor already has heavy wear, one new board can look like a patch of new paint on an old car. Sometimes refinishing a larger area, like a whole room, creates a stronger result.
Preventing the next round of repairs
Most damage comes from the same culprits, and prevention costs less than any repair. Use quality felt pads under furniture that moves. Replace them every 6 to 12 months because they load with grit and become sandpaper. Use a breathable rug pad under area rugs, not rubber or PVC that can discolor finishes. Keep entryways clean with outdoor mats to trap grit before it meets the floor. Normalize lifting instead of dragging heavy items. Add soft casters to chairs. Maintain consistent indoor humidity so floors move less. A small console humidifier in winter makes a real difference in gap season.
Cleaning matters. Avoid steam mops on wood and laminate. They force moisture into seams and soften adhesives. A barely damp microfiber mop and a cleaner recommended by your flooring manufacturer protects both finish and warranty. Some finishes prefer neutral pH cleaners; harsh cleaners dull sheen and sometimes void coverage.
Edge cases that separate a tidy fix from a lingering headache
Not all floors behave by the book. A few scenarios I see regularly:
- Gray or black lines in scratches that won’t take color easily often indicate water intrusion and iron staining, especially in oak. Oxalic acid can lighten those stains before you try to color match. Neutralize thoroughly with clean water and allow full dry time before finishing.
Parquet and chevron patterns expose poor repairs immediately because lines draw the eye. Keep repairs within the geometry of the pattern. If a gouge crosses a joint, replace both affected pieces or realign the repair to that seam so your line doesn’t betray you.
Sun‑bleached areas near windows can’t be matched by staining darker alone because the surrounding wood may be lighter internally too. Sometimes you tint the finish slightly across a larger blend area instead of trying to drop a dark patch in a pale field. UV protective window films or shades reduce future mismatch.
High‑gloss floors are unforgiving. Any burn‑in, filler, or brush mark telegraphs. Be ready to polish a larger area or call a pro with buffing tools to relevel the sheen.
Underfloor radiant heat amps up seasonal movement. Slivers and rigid fillers don’t last as well. Choose flexible fillers and monitor humidity more closely. Many engineered products perform better over radiant than solid wood, so if you’re planning a future upgrade, that’s a good discussion to have with a flooring installation service.
Choosing DIY versus calling a pro
Your tolerance for imperfection and available time matter as much as the technical challenge. A crisp homeowner can fix a white scratch in ten minutes and feel great about it. The same person might spend three hours on a deep gouge only to end up with a glossy eye sore. If the repair sits in the middle of a room that floods with morning light, subtle defects become obvious. If it’s behind a sofa, the threshold for DIY is lower.
A flooring company brings specialized products, a trained eye for color, and the right tools when a job crosses that line. If you’re in a region like Mecklenburg County, asking a flooring contractor Charlotte homeowners recommend saves time and risk. Look for a team that handles both flooring repair and new installations, not just installs. They’ll understand the anatomy of your floor and how to preserve warranties. A flooring company Charlotte residents trust will also stand behind a repair, a comfort if something shifts with the next season. The same goes for a flooring installation service Charlotte builders rely on; they’ll know subfloor quirks in local housing stock, from slab moisture in newer neighborhoods to plank subfloors in older homes.
Real‑world examples and what they teach
A homeowner called about “mystery gaps” in a prefinished oak floor across a kitchen run. The gaps were narrow, consistent, and only along one interior wall. Humidity readings were steady. Turns out the dishwasher had a slow leak that swelled the substrate under one side, lifting boards and pinching others until gaps opened elsewhere. Fixing the leak, drying the subfloor to stable moisture, and then releasing tension at the room edge allowed gaps to close naturally. No filler required. The lesson: before you fill, ask why.
Another job involved a deep dog‑induced gouge in an engineered maple plank, right in front of a sliding door. Maple is tricky to color because it blotches and tends to read creamy under warm light, greenish under cool light. We replaced the plank rather than risk an obviously patched spot that would never look right in full sun. The adjacent planks were slightly cupped from mild moisture intrusion. After correcting the exterior door sweep and flashing, the new plank stayed flat. The lesson: sometimes replacement and fixing the cause beats clever blending.
One more: a laminate floor with scattered white scratches in a rental. Touch‑up kits from the local big box store left chalky spots the owners hated. We cleaned thoroughly, applied a very thin wipe of a laminate‑safe restorer to even the sheen, then used a three‑color wax crayon set to draw in a loose grain pattern on the worst scratches. Under rental lighting, the floor looked new enough. The lesson: match the level of repair to the property’s use and lighting, not just to ideals.
Working with the grain of your home
A floor is part of a system. Subfloor, environmental control, finish maintenance, and habits all interact. You can learn a lot by kneeling down and seeing what the floor is telling you. Scratches run in patterns. Gaps open where air is dry or edges are pinched. Dents happen at chokepoints. Look for that pattern before you pick up a tool.
If you’re preparing a house for sale, target the high‑visibility wins. Blend out white scratches, replace a couple of hopeless planks, reset any squeaks if accessible, and clean and even out the sheen. If you’re settling in for the long term, think about upstream fixes: felt under furniture, better humidity control, soft wheels, and a maintenance schedule that suits your finish. A good flooring repair plan extends the time before a full refinish or replacement by years.
For homeowners who prefer not to gamble with color or chemistry, a call to a flooring repair specialist simplifies the path. A flooring repair Charlotte crew will know what local humidity does to hickory versus maple, whether your slab in Steele Creek needs vapor mitigation before any adhesive goes down, and how to match common prefinished SKUs seen across the area. If you do need new material, a flooring installation service can evaluate whether your subfloor is ready or needs work, and whether an engineered product would better handle your home’s conditions. There’s no shame in phoning a pro for a 90‑minute fix rather than spending a weekend on trial and error.
A practical step‑by‑step for a common repair: a light scratch on a site‑finished floor
- Clean the area with a damp microfiber cloth, then a touch of denatured alcohol to remove oils. Dry thoroughly.
- Lightly abrade the scratch and an inch around it with 1500 to 3000 grit micro‑mesh. Feather the edges; don’t dig.
- If the scratch reaches wood, apply a matching stain with a fine brush only to the exposed wood. Let it dry per product guidance.
- Apply a thin coat of compatible finish with a small foam brush or pad, staying within the abraded area. Allow to dry, then lightly scuff and apply a second thin coat if needed.
- Evaluate sheen under room lighting. If it flashes shiny, dull it gently with a very fine pad or apply a satin coat to blend.
Final judgment calls that keep repairs honest
The best repair is the one you forget about. If you find yourself stacking products to force a fix, pull back. Reassess the cause, the material, the finish, and the visibility. If a fix will always read as a patch, consider replacing the component or expanding the scope so the blend line lands in a natural break, like a doorway or a board edge. Patience pays. So does stopping before you’ve gone too far.
Whether you tackle the work yourself or bring in a flooring company, the path is the same: diagnose accurately, choose the simplest effective method, match color and sheen carefully, and respect the way your floor wants to move. Scratches, dents, and gaps will always happen. With the right approach, they don’t have to steal the story your home is telling.
PEDRETTY'S CERAMIC TILE AND FLOORING LLC
Address: 7819 Rolling Stone Ave, Charlotte, NC 28216
Phone: (601) 594-8616