Flooring Installation Service: Tips for Installing Around Cabinets
Cabinets complicate flooring in a way drawings don’t fully capture. Floors meet immovable weight, out-of-square lines, plumbing, and toe kicks that never seem to line up. A clean result lives in the gap between precision and pragmatism. I’ve seen beautiful floors cheapened by sloppy scribe cuts around islands, and modest materials look premium because someone took an extra hour with a template and a sharp blade. Whether you’re a homeowner trying to understand the process or vetting a flooring contractor in Charlotte, these are the details that make floors around cabinets look intentional, not jammed in at the last minute.
Start with the right sequencing
The best time to think about cabinets and flooring is before either one is installed. In a remodel where cabinets already exist, you work with what’s there. But if the job is phased, sequencing can save time and prevent headaches.
There are two schools of thought. Some flooring contractors prefer to install flooring wall to wall before cabinets go in. This yields a continuous plane, easy layout, and clean transitions. Others set the cabinets first and floor to the cabinet faces. Both approaches can be correct. The deciding factors are material type, future serviceability, appliance clearances, and whether heavy cabinet loads might compress a floating floor.
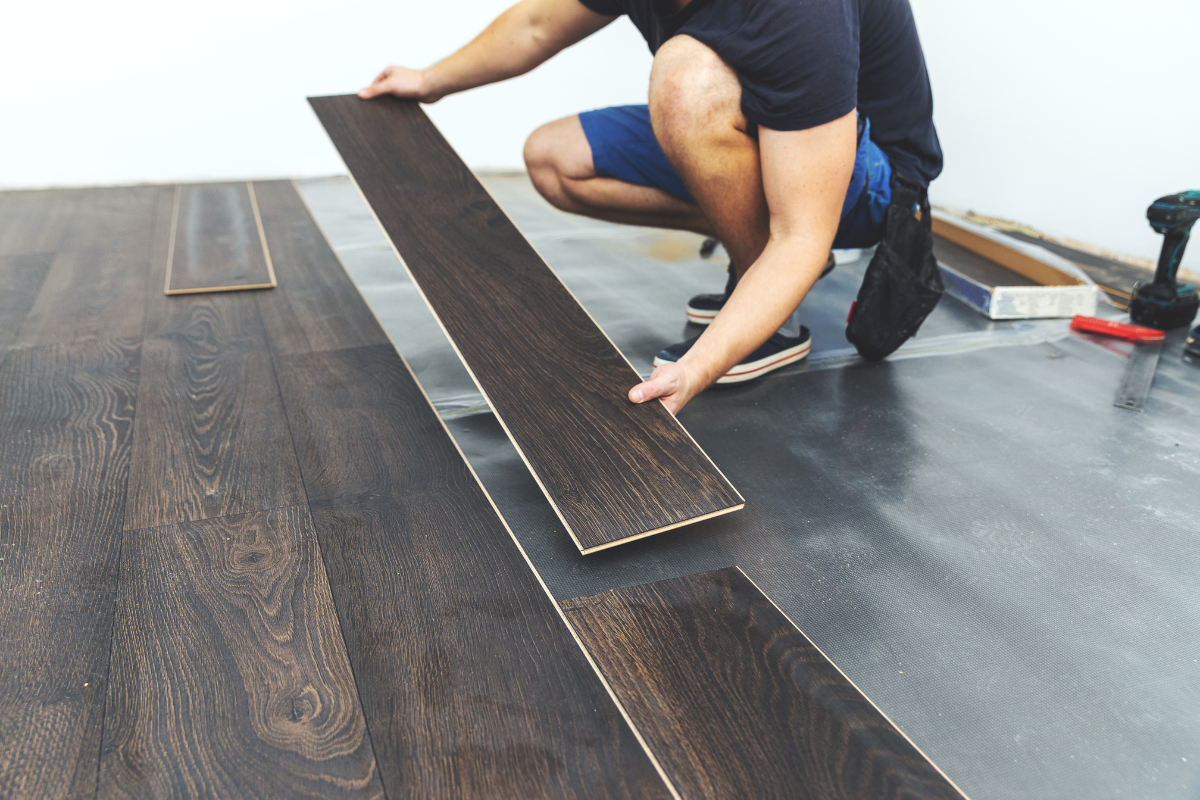
Solid hardwood nailed to a subfloor does well as a full-room installation. It can carry cabinet loads without protest provided you’ve checked joist span and deflection. Floating floors, including most laminates and many luxury vinyl planks (LVP), should not be locked under heavy cabinetry because they need to expand and contract freely. A kitchen island sitting on a floating floor can behave like a clamp, warping panels or opening joints. For those, install cabinets first, then run flooring to the toe kick with the correct expansion gap and trim it with shoe molding or scribe.
As a rule, a competent flooring installation service will review appliance specs and cabinet plans before committing to a sequence. In Charlotte homes with crawlspaces and summer humidity swings, the expansion question matters more than in drier climates. Ask your flooring company if their plan protects expansion spaces and keeps you within manufacturer guidelines. Warranty issues have a way of appearing exactly where shortcuts lived.
Measuring the reality, not the drawings
Cabinet lines rarely run perfectly straight, especially in older homes. Even new cabinets can deviate a quarter-inch over a long run. Floors telegraph those imperfections unless you plan the layout to absorb them. Before cutting the first plank, measure the room along the cabinet face in multiple spots. Snap a control line parallel to the cabinet run, then verify how that line relates to the main field layout.
If the floor layout puts a sliver cut at the toe kick, adjust the starting row. A one-inch rip against a cabinet will show every wave in the base. Better to shift by half a plank and land a two- to three-inch strip, which reads cleaner and is less prone to cupping or lifting at the edge. On patterned products like herringbone or hex tile, the cabinet line needs particular care because the human eye is ruthless about symmetry. For a flooring company Charlotte homeowners can trust, this is where judgment separates pros from hobbyists.
Account for appliance openings and end panels too. A dishwasher bay may require shimming to keep finished height consistent with the adjacent floor if you’re flooring after cabinets. Fridges want plumb and level tracks, or doors won’t seal correctly. These are small details with outsized consequences: a wobbly fridge can sound like a drum, and a misfit dishwasher can snag flooring edges every time it slides.
Expansion gaps around fixed cabinetry
Every floating floor needs expansion space per the product’s technical sheet, typically 1/4 inch around fixed vertical elements. That includes cabinet sides, island panels, and peninsulas. Where flooring meets a wall that will be covered by baseboard or shoe, the gap hides easily. Under toe kicks, you need a clean, consistent reveal because you’ll see it when you kneel down or pull a trash bin.
I keep a set of spacers cut to the manufacturer’s minimum gap for the job. As the first rows run to the cabinet base, those spacers create an accurate, repeatable gap. Where the toe kick recess is shallow, a narrow block and painter’s tape holds the plank steady while adhesive cures or a click joint sets. If the run extends long, consider periodic relief points behind removable panels or end caps, especially on large islands.
On nailed hardwood, the conversation shifts from expansion to scribing and molding. You still want breathing room relative to seasonal movement, just not as strict as floating systems. Shoemold or scribe molding hides the perimeter and lets the floor move beneath, which is why you never caulk those gaps shut on wood floors.
Scribing to toe kicks and end panels
Uneven toe kicks are a constant. Good scribing can disguise a crooked cabinet, but it should never lock a floating product in place. For floating floors, the scribe line still respects the expansion gap. You aim for a curved or tapered molding that kisses the floor, not a plank that kisses the cabinet. With site-finished wood or glue-down LVP, you can cut tighter to the base because expansion stresses are different, but you still maintain a controlled gap and finish it with trim or color-matched flexible filler where molding is inappropriate.
I like to template complex curves with 1/8-inch hardboard or even heavy paper. On an ornate furniture-style vanity, for example, make a quick template, transfer to the plank, then use a jigsaw with a fine-tooth blade set to a slow speed. A sharp scribe cut saves you from the ripple you get when you “walk” the saw around a tight radius. Sand the cut lightly with a 120-grit block. In corners, ease the inside radius rather than leaving a sharp point, which can act like a stress riser and chip later.
Don’t overlook the visual break. Where cabinet legs show, especially on islands with furniture feet, decide whether the flooring runs tight with small dust lines, or whether you build a discrete shoe around each leg. On luxury projects with wide-plank European oak, I tend to run clean and tight with a hairline reveal, then wax-fill microgaps. On rentals or high-traffic kitchens, a micro shoe gives you a replaceable edge that takes the abuse instead of the floor.
Dealing with dishwashers, stoves, and refrigerators
Appliance bays can make or break the installation sequence. A dishwasher typically needs to slide out for service. If your new floor raises the finished height and traps the machine under the countertop, you just baked in a future flooring repair when the pump fails. Keep the finished height in mind. You may opt to set the dishwasher on a plywood pad that matches the new floor thickness, then run flooring to the toe space with a removable threshold strip. Some flooring installation service teams in Charlotte standardize this detail because they’ve met enough angry homeowners and stubborn dishwashers to know it is worth the extra fifteen minutes.
Slide-in ranges and standalone stoves bring heat near the floor edge. LVP and laminate have upper temperature limits, and rubber backers can mark hardwood if a hot pan lives too close to the toe kick and radiates heat. Check the manufacturer guidance and add an aluminum heat shield strip at the range face if recommended. Refrigerators are heavy and like smooth, flat paths. Use a panel lifter, not a pry bar, to avoid bruising the new floor when you roll one back into place. If the floor is floating, move appliances carefully in the long direction of the planks to avoid buckling joints.
Height transitions and why shims matter
Kitchens often accumulate layers. Pull an old sheet vinyl and you might find a quarter-inch underlayment under that, plus a proud seam in the subfloor that nobody sanded in 1998. If you’re installing after cabinets, the finished floor thickness relative to the toe kick opening determines whether standard quarter-round looks proportional or too bulky. Thin products like glue-down LVP can leave a tall gap under the toe, making the reveal feel cavernous. You can cheat this by adding a painted riser strip behind the toe kick recess to drop the shadow line. For floating floors, maintain the expansion gap in front of that riser.
At room transitions, keep thresholds aligned to door centers where possible. Around a pantry cabinet, a discreet flush-mount reducer looks better than a clunky overlap molding. I’ve found that even a three-sixteenth-inch lip can catch a sock, so bevels matter. If the adjacent room is tile, plan grout joints and plank seams so you commercial flooring don’t create a tiny sliver in the doorway. These are the quiet decisions that make a flooring company look expensive without charging more.
Cutting strategies that won’t betray you later
Around cabinets, you do a lot of rips and notches. Those cuts must stay clean under stress. On laminates and many LVPs, a sharp, high-tooth-count blade matters more than the brand of saw. Use blue tape over the cut line to minimize chipping on printed wear layers, and orient the plank so the blade exits the finished face cleanly. For hardwood, a track saw gives you straight, burn-free rips that edge-join tightly. Take a hair off the factory micro-bevel with 220-grit paper if you are marrying a ripped board engineered hardwood Charlotte against factory edges. It reads as custom rather than patched.
Inside corners near cabinet returns are prone to crack because there’s little material remaining. Drill a small relief hole at the inside corner before you finish the cut with a jigsaw. That stops a split from running later. Where plumbing penetrates in a sink base, use split collars on the flooring rather than tight holes. On floating floors, cut two semicircles and rejoin behind the pipe with color-matched adhesive, leaving expansion room concealed by an escutcheon.
Moisture, subfloors, and the kitchen’s reality
Water is a constant threat in kitchens. I’ve replaced swollen laminate floors after a slow dishwasher leak more times than I can count. A reputable flooring installation service will moisture-test the subfloor. In Charlotte’s humid summers, crawlspace ventilation and vapor barriers matter. A wood subfloor above 12 percent moisture is a red flag. For slabs, verify internal relative humidity with in-situ testing if you’re gluing down, or use the manufacturer-approved underlayment for floating systems with a vapor retarder.
I also look at leak paths. A sink base often hides a little drip. If you see signs of previous damage, fix the plumbing before laying a single plank. On water-resistant LVP, the joints can repel splashes, but standing water at cabinet edges will still find its way under toe kicks. Silicone at perimeter edges is tempting but risky because it can trap moisture and eliminate movement room. Use sealants only where the manufacturer instructs, typically at exterior doors and wet zones, and keep it flexible.
Working with toe kicks: remove or work beneath?
When cabinet toe-kick boards are removable, take them off. Flooring runs tighter and cleaner, and you can scribe the toe pieces to the finished floor. Many standard cabinets use brad-nailed or stapled toe skins. Gently pry them off with a wide putty knife and save the skins for reinstall. If the toe is integral to a furniture base, you work beneath. That calls for careful scribing and a consistent reveal. Use a low-profile pull bar to lock joints without marking the base.
Shoe molding can rescue small inconsistencies, but it is not a license to get sloppy. A quarter-round that waves along a cabinet base announces every bad cut. When I’m installing in a kitchen with painted cabinets, I pre-paint the shoe to match the cabinet color, then caulk the top edge lightly after install, leaving the bottom edge free to move over the floor. On stained cabinets, I stain and clear coat the shoe before install so nail holes can be filled neatly. It takes longer, but the finish looks furniture-grade.
Islands, peninsulas, and the weight question
A kitchen island sits where craft is most visible. If your floor is nailed hardwood, you can run under the island footprint and fasten cabinets through to studs and blocking as usual. For floating floors, you stop at the island panel and maintain the perimeter gap. What about islands with electrical in the floor? The localized fasteners for conduit supports shouldn’t pin a floating floor. Either set the island on the subfloor and finish panels down to the floor plane, or frame a platform bonded to the subfloor that sits inside the island footprint, then floor around it. A good flooring contractor in Charlotte will coordinate this with the cabinet installer and electrician so no one is stuck improvising after the island arrives.
Peninsulas tethered to a wall are easier to manage, but watch for the long straight run that amplifies any out-of-parallel layout. If a peninsula is a hair off square to the wall, splitting that error between the cabinet and the opposite wall keeps the eye from landing on a single crooked line.
Repair scenarios: when things go sideways
Even with careful planning, kitchens throw surprises. A scratched plank under a cabinet end panel is a common one. If the floor is floating click-together, you may be able to disengage back to the damaged board. If the toe space is tight and the panel unyielding, a glue-assisted “drop-in” patch sometimes saves the day: cut the bottom lip of the groove off the replacement board, apply a quality adhesive in the joint, and weight it until cured. This is a last resort, but it beats tearing out a long run under fixed cabinetry.
For nailed hardwood, spot repairs around cabinets require a plunge cut with a sharp chisel or oscillating tool, careful removal of the board, and a spline if you vinyl plank flooring are reversing direction into an existing tongue. Stain blending is the challenge. Test on offcuts and factor in that existing floors have aged. Often you stain a touch lighter; finish coats deepen the tone. A local flooring repair Charlotte specialist who keeps a swatch book of common stain combinations earns their fee here.
Water damage under a sink may force selective demo. Remove toe skins and set up fans and a dehumidifier to dry the cavity before you judge the extent. LVP may survive if the water didn’t sit long, but many laminates swell at the edges and won’t recover. Insurance adjusters tend to replace by contiguous room, not patch in the middle of a field, which is another argument for keeping accurate product records and a couple extra boxes stored.
Working with a pro: what to ask and expect
Homeowners often call a flooring company when the cabinets are already on order or installed. That’s fine, but the earlier you loop in a professional, the smoother the edges. When you interview a flooring installation service Charlotte homeowners like to recommend, ask about expansion strategy around fixed cabinetry, how they handle dishwashers and appliance height, whether they remove and reinstall toe kicks, and what their plan is for scribing without pinning a floating floor.
Clarify who supplies trim. Cabinet shops often provide toe skins and panels but not shoe molding. A flooring company Charlotte crews bring their own standard quarter-round unless told otherwise. Color matching painted cabinets is usually the cabinet painter’s job. Agree on that in writing so you don’t end up with mismatched whites — the human eye can spot two shades of white that are only a few points apart.
Timelines also matter. If your contractor glues down LVP or engineered wood, ask about cure times before moving appliances back. A stove rolled onto uncured adhesive can shift the floor, creating hollow spots you won’t detect until later. Good crews sequence rooms so kitchens are not taken out of service longer than necessary, but a little patience buys a cleaner result.
Material-specific choices around cabinets
Different materials behave differently when they meet the stubborn reality of cabinetry.
-
Solid hardwood: Nails or staples to subfloor, stable under cabinetry. Ideal for full-room installs. Needs expansion at the perimeter and careful acclimation to Charlotte humidity. Site finishing lets you feather lines at cabinets for a seamless look.
-
Engineered wood: Click or glue-down. Floating versions shouldn’t be trapped under islands. Glue-down handles cabinetry well and gives a low profile under toekicks. Mind moisture limits on slabs.
-
Laminate: Floating, so treat cabinetry as fixed obstruction. Strong visuals, but edge swelling from leaks is a risk. Respect expansion and avoid wedging cuts tight to bases.
-
LVP/LVT: Available as floating or glue-down. Glue-down performs well around cabinets and in appliance bays. Floating versions need strict expansion spaces. Temperature tolerance near ranges must be checked against specs.
-
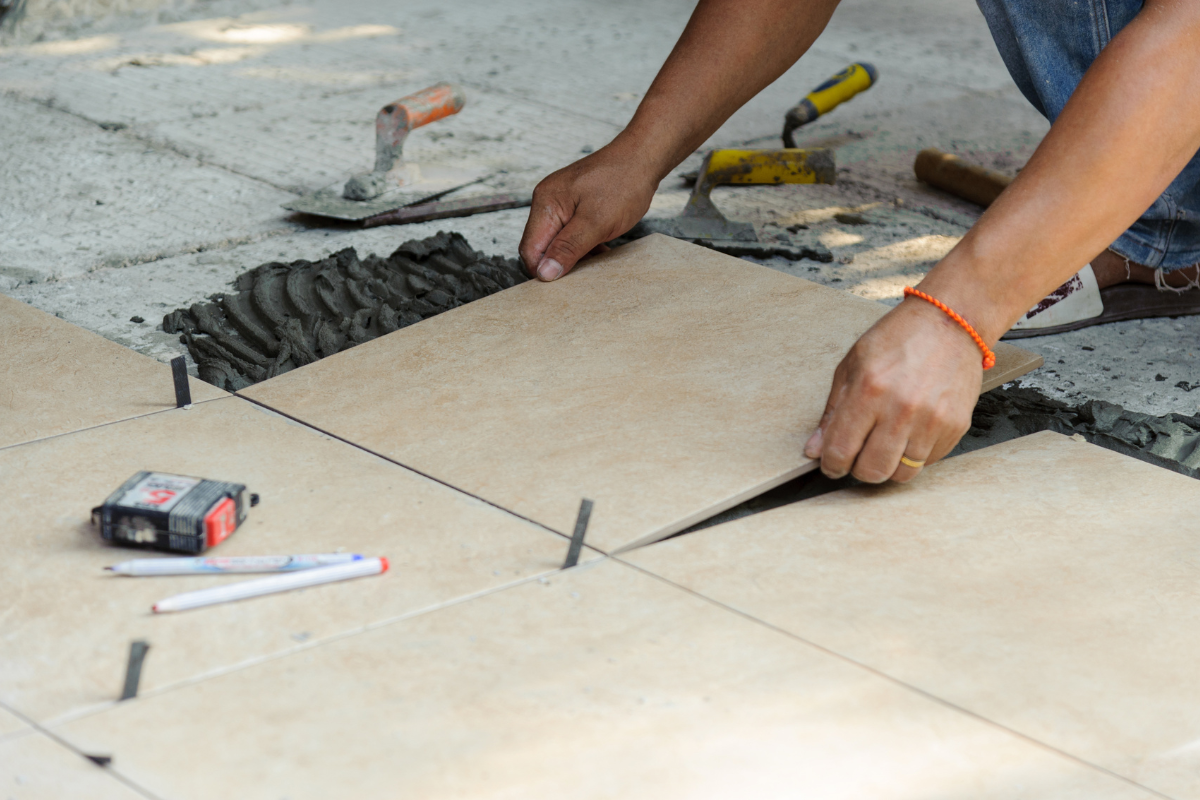
Tile: Cabinets can sit on the tile or tile can run to the cabinets. Movement joints at perimeters still apply. Cutting around toe kicks is precise work; use a wet saw and layout that avoids slivers. Heavy appliances require planned thresholds to avoid cracking at edges.
I’ve walked into kitchens where the product choice did not match the cabinet plan. A homeowner fell for a thick cork-backed plank, then discovered the dishwasher wouldn’t clear the counter. The fix involved lowering feet, shaving the countertop bracket, and still left little margin. A half-hour of pre-planning avoids that kind of corner.
Safety, dust, and the lived-in kitchen
People live in kitchens even during remodels. A careful flooring installation service will run dust control, set up plastic at doorways, and cut outside when possible. Oscillating tools under cabinets kick up fine dust that drifts into pantry shelves. Tape them shut or empty them first. Protect cabinet faces with removable film when moving saws and compressors in and out. It takes one bump to nick a new shaker door. I still use neoprene pads as temporary runners along cabinet bases when kneeling to lay the first rows. Kneepads alone can polish a sheen into painted kicks if you slide on them all day.
Noise matters too. If the job runs into the evening, alert neighbors in condos or townhomes. In single-family homes around Charlotte, most neighborhoods tolerate the daytime whine of saws, but it’s polite to check HOA quiet hours. Professionals who respect the home tend to be meticulous with the floor.
Cost and time expectations
Installing around cabinets adds labor. Expect more fitting, more trips to the saw, and slower rows as you work under toe spaces. In my experience, flooring around existing cabinets can add 10 to 25 percent to labor time compared to wide-open rooms. Complex islands and appliance bays push toward the high side. Glue-down systems are slower near cabinetry because adhesive spread is interrupted by cuts and scribe work. Click floors go faster, but tricky corners still eat time.
As for price, every flooring company sets rates differently. A flooring contractor Charlotte residents hire for premium kitchens will often include a line item for cabinet interfacing, shoe molding, and appliance handling. It is fair to ask for a breakdown. If someone bids unusually low, confirm that they plan to remove and reinstall toe skins, manage dishwasher height, and handle trim painting. The cheapest number sometimes omits those tasks, leaving gaps you’ll pay to close later.
When to stop and call for help
Some work rewards determination, but flooring around cabinets also rewards free flooring repair estimate knowing your limits. If your cuts wander, if your first scribe looks ragged, or if you’re guessing about expansion, pause. A day spent consulting a pro costs less than ripping out a week of mistakes. Local teams that handle flooring repair Charlotte homeowners request see the same problem patterns over and over: buckled floating floors trapped under islands, dishwashers locked in place, quarter-round hiding gapped cuts that pop during a humid July. A quick site visit can recalibrate your plan.
And if you’re hiring from the outset, prioritize installers who speak in specifics. They should reference manufacturer tolerances, appliance specs, and moisture numbers, not just “we’ll make it work.” In kitchens, details are destiny.
A simple two-part checklist for clean cabinet interfaces
-
Confirm sequencing and heights: Decide whether flooring runs before or after cabinets based on product type, verify finished floor height against dishwasher opening and fridge casters, and plan transitions.
-
Protect movement and edges: Maintain expansion gaps at all cabinet faces, scribe molding rather than pinning floating floors, use proper blades and templates for clean cuts, and coordinate toe kicks and trim for a seamless look.
The payoff of disciplined work
Installing flooring around cabinets isn’t glamorous, but it is the portion guests unconsciously judge. They won’t notice your perfect moisture reading or your relief cut behind the peninsula. They will notice a wavering shoe against a proud toe kick, a plank with a chewed notch at a cabinet leg, or a dishwasher that scrapes when it rolls. The difference between adequate and excellent lives in a set of habits: measure reality, respect expansion, template the odd shapes, and choreograph the appliances. That’s true whether you’re running slick glue-down vinyl in a rental or quarter-sawn white oak in a custom build.
In a city with broad seasonal swings like Charlotte, consistency pays even more. A flooring installation service that treats cabinets as part of the system, not an obstacle course, will leave you with a kitchen that looks tight in January and July. That discipline also makes future flooring repair simpler because the perimeter and transitions were built with service in mind.
If you’re evaluating a flooring company, listen for that mindset. The right crew will talk about sequencing, toe kicks, and dishwasher feet with the same care they give to species selection and plank width. Floors anchor a kitchen, but it’s the way they meet the cabinetry that tells you who did the work.
PEDRETTY'S CERAMIC TILE AND FLOORING LLC
Address: 7819 Rolling Stone Ave, Charlotte, NC 28216
Phone: (601) 594-8616